7.1. How to Customise your module in Pro Tools
7.1.1. Introduction
This video shows how to fully customize your Forte Import module, letting you tailor categories, instrument names, colors, routing, and naming styles to fit your personal workflow and session needs.
7.1.2. Accessing the customize menu
- Click on Customize in the Forte Import interface.
- Here you’ll see all your categories, instrument names, and routing destinations.
7.1.3. Organizing categories and instruments
- Reorder categories by dragging them into your preferred sequence.
- Rename categories or instruments by double-clicking on their names and typing your desired label.
- Change category colors by selecting a new color (for example, set a category to yellow).
7.1.4. Managing instruments within categories
- Decide which instruments belong in each category.
- If you want to move an instrument (e.g., move “Ride” from Drums to another category), simply drag and drop it.
- Each instrument can only belong to one category at a time.
7.1.5. Setting output routing
- Assign output routing destinations for each category or instrument.
- This is linked to your session and makes automatic routing much easier.
- Click on the “Select Output” button to save your routing preferences—Forte will handle routing automatically during import.
7.1.6. Naming and color style preferences
- Choose your preferred naming style: Title Case, UPPERCASE, or lowercase.
- Select your color style: default palette (e.g., blue), or none (everything becomes black).
- Adjust these settings to match your organizational preferences.
7.1.7. Saving and applying your customization
- After making your changes, click Confirm to save and apply all customizations.
- Your Forte Import module will now reflect your personalized setup, streamlining your mix prep and session organization.
7.2. How to Customise your module in Logic Pro
7.2.1. Introduction
This video shows how to fully customize your Forte Import module, letting you tailor categories, instrument names, colors, routing, and naming styles to fit your personal workflow and session needs.
7.2.2. Accessing the customize menu
- Click on Customize in the Forte Import interface.
- This opens the full customization panel, aligned with your current project.
7.2.3. Organizing categories and instruments
- Edit category names and colors as you prefer.
- Reorder categories and instruments by dragging them into your preferred sequence.
7.2.4. Managing instruments within categories
- Change which instruments belong to each category directly in the customization panel.
- Instruments can be moved from one category to another as needed.
7.2.5. Setting output routing
- All available Logic Pro buses are displayed.
- Assign or change the bus routing for each category or instrument as needed.
7.2.6. Enabling and adjusting advanced features
- Strip Silence: Enable and configure settings to automatically remove silence from imported tracks.
- Stereo to Mono: Enable and adjust settings to automatically convert stereo files to mono when appropriate.
7.2.7. Naming and color style preferences
- Choose your preferred naming style: Title Case, UPPERCASE, etc.
- Select your color style: default palette, custom colors, etc.
7.2.8. Saving and applying your customization
- After making your changes, save the entire configuration as a preset.
- This allows you to quickly recall your preferred setup for future projects.
7.3. How to Customize Each Instrument Label to Your Taste with Forte Import
7.3.1. Introduction
This video demonstrates how to rename or customize the label of any instrument in Forte Import, allowing you to use your preferred abbreviations or naming styles for a more personalized workflow.
7.3.2. Accessing the customize menu
- Click on Customize in the Forte Import interface.
7.3.3. Renaming an instrument
- In the Customize menu, go to the Instrument column.
- Find the instrument you want to rename (for example, “Snare”).
- Click on the current label on the right side of the instrument’s row.
- Delete the existing name and type your preferred abbreviation or name (for example, change “Snare” to “SNR”).
- Click OK (or confirm) to save your changes.
7.3.4. Applying your custom label
- From now on, the instrument will appear with your custom label in Forte Import and throughout your workflow.
7.4. How to Set Up Your Import Module Settings. General Rename Settings
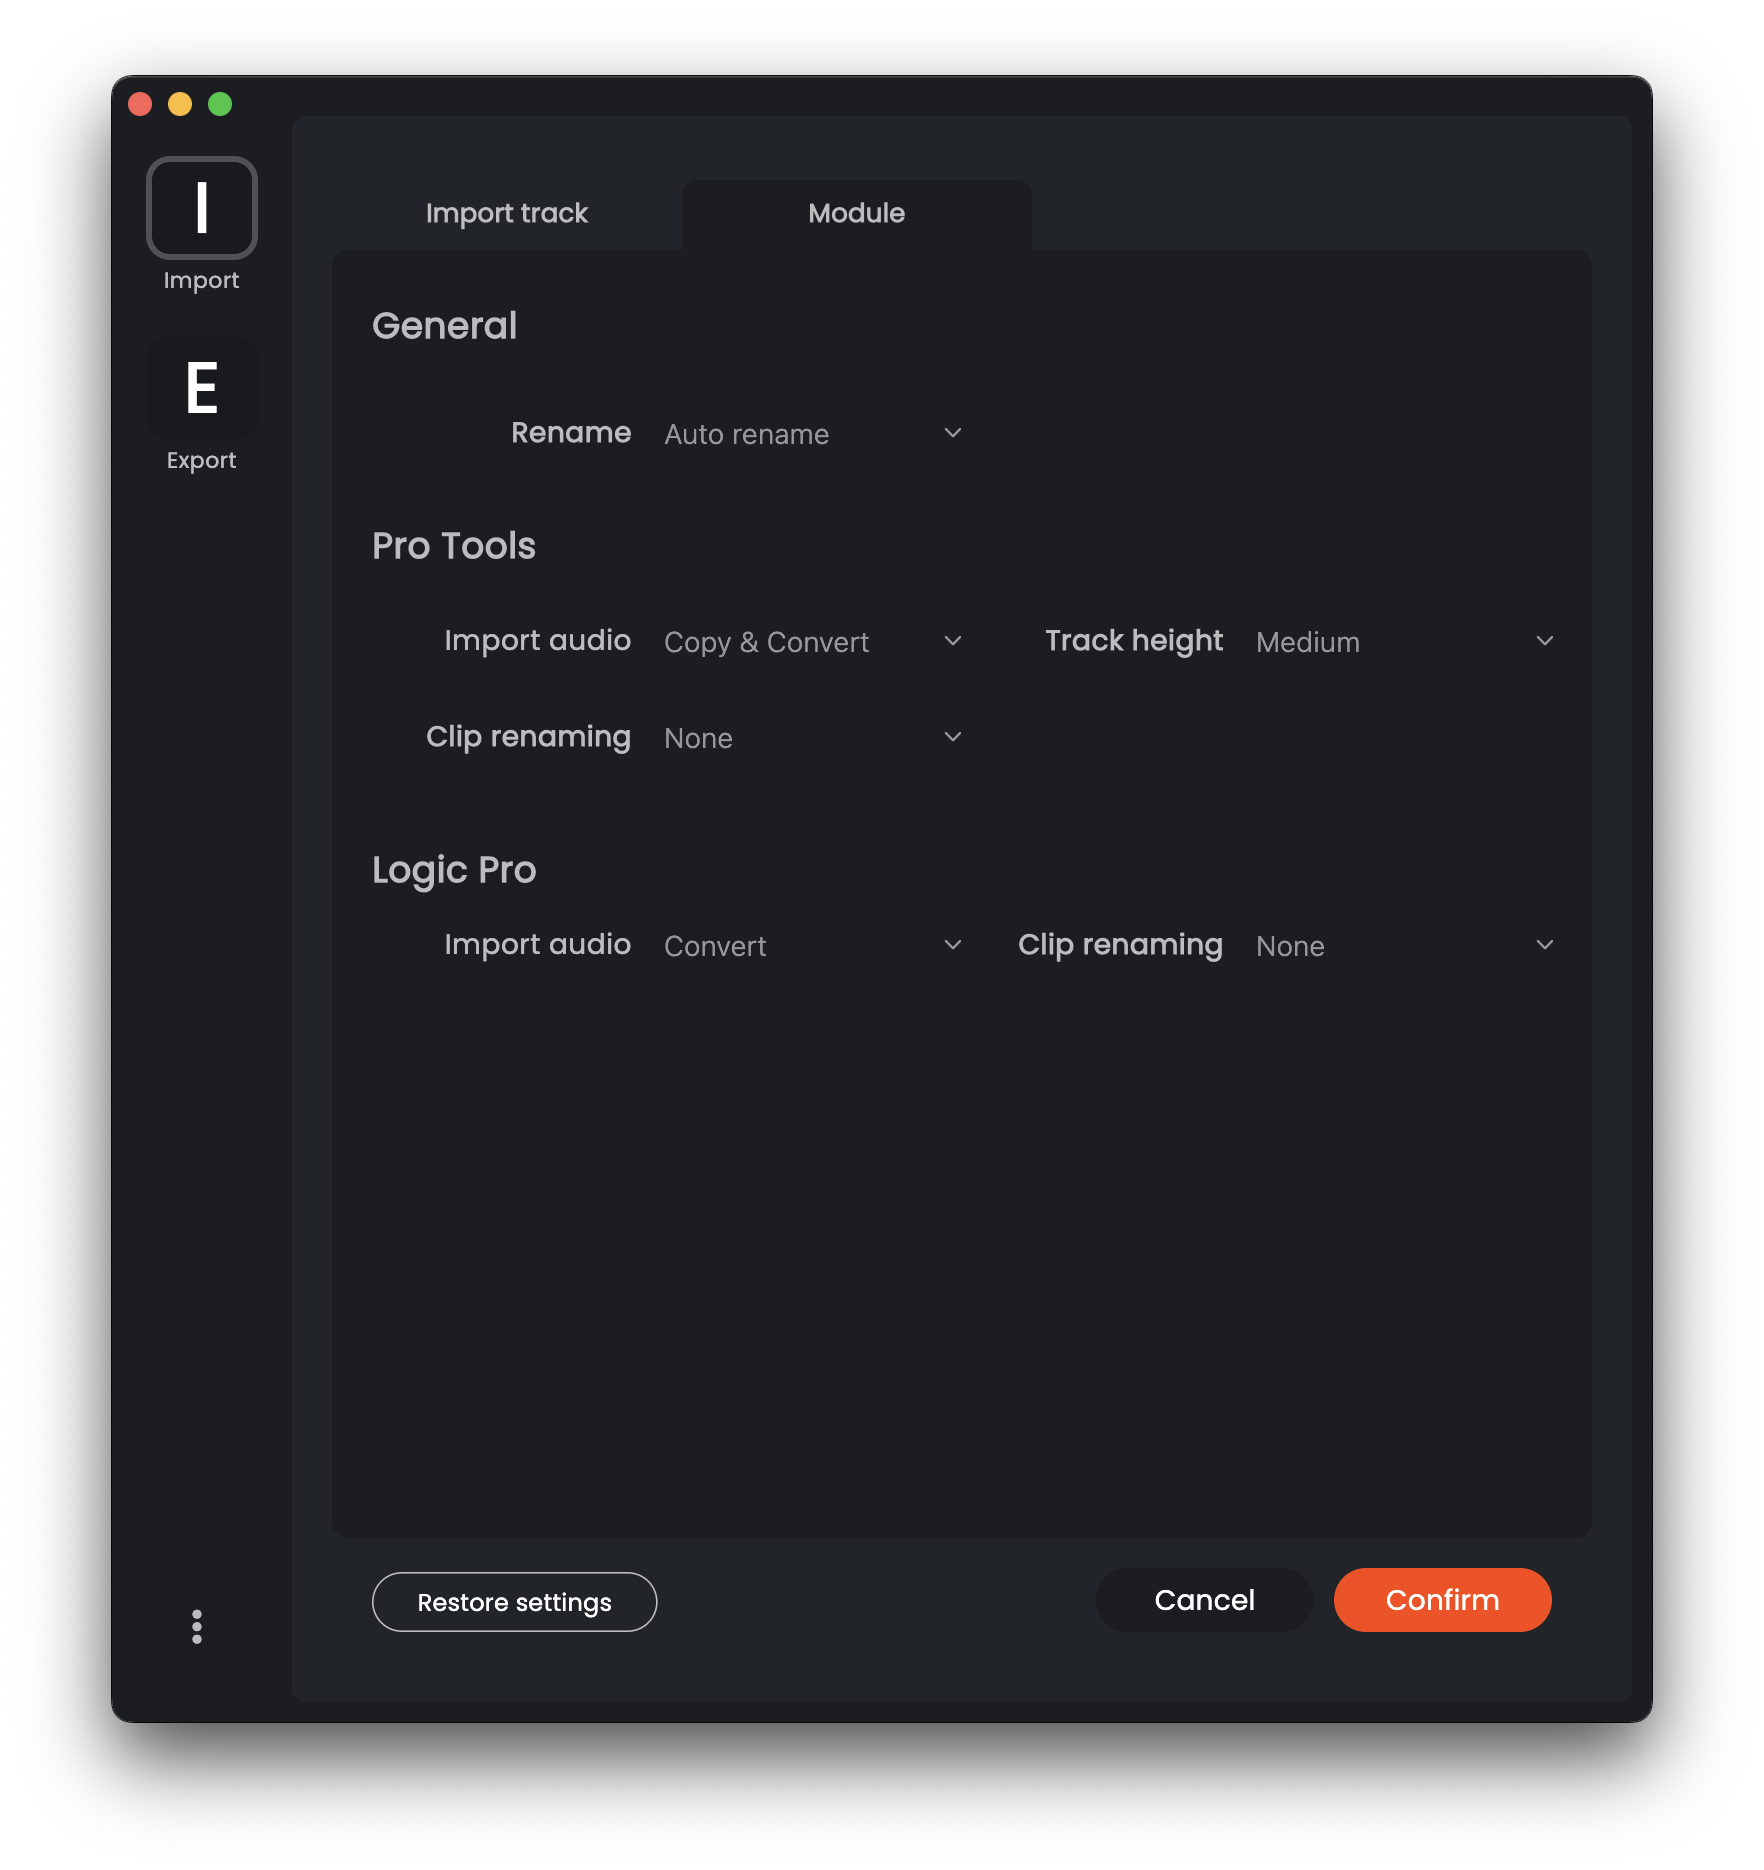
7.4.1. General Rename Settings
- You can choose whether to use Forte’s automatic renaming or keep the original name of the audio file during import.
7.4.2. Pro Tools Specific Settings
- Import Audio: Decide if you want to add, copy, or copy and convert the audio files when importing them into Pro Tools.
- Track Height: At the end of the import process, you can set the default height for all tracks in the session (small, medium, large, etc.).
- Clip Renaming: Choose whether to rename only the track in the DAW, or also rename the clip and the audio file itself.
7.4.3. Logic Pro Specific Settings
- Import Audio: Choose whether to convert the audio tracks to match the project settings, or adapt the project to the characteristics of the imported audio files.
- Clip Renaming: Decide if you want to rename only the track in the DAW, or also the clip.